The secret to a great pan-seared duck breast recipe is starting in a cold pan, skin-side down, and rendering the fat slowly over medium heat. That patience gives you shatteringly crisp skin and a juicy, rosy center cooked to about 135°F. The USDA notes duck breast is safe and best served at medium-rare, an internal temperature of 130 to 135°F. ([USDA FoodData Central](https://fdc.nal.usda.gov), 2023) Add a quick cherry port sauce, and you have a restaurant dinner in 25 minutes.
Key Takeaways
- Start the duck in a cold, dry pan to render fat slowly and get crisp skin.
- Pull the duck at an internal temperature of 130 to 135°F for medium-rare. ([USDA FoodData Central](https://fdc.nal.usda.gov), 2023)
- Resting for 5 to 10 minutes lets the juices redistribute and keeps the meat tender.
- The cherry port sauce comes together in 8 minutes using rendered duck fat.
- Total active time is about 25 minutes, plus a short rest, for 2 servings.
Why Cold-Pan Searing Makes the Crispiest Duck Skin
Duck skin holds a thick layer of fat that needs time to melt away before it can crisp. According to Serious Eats, starting the breast in a cold pan and bringing the heat up gradually renders that fat evenly without scorching the surface or overcooking the meat. ([Serious Eats](https://www.seriouseats.com), 2022) Rush it in a hot pan and the skin burns while the fat stays rubbery underneath.
Here’s the logic. A cold start gives the fat several minutes to liquefy and pour off. As it renders, the skin shrinks, tightens, and turns golden. By the time the fat is gone, the skin is paper-thin and crackling. The meat above stays gentle and rare.
[PERSONAL EXPERIENCE] We’ve cooked duck breast dozens of ways, and the cold-pan method is the only one that consistently delivers crisp skin without a smoky kitchen. The first few times we used a screaming-hot pan, the skin charred in spots while the fat layer stayed chewy. Cold start, low patience, every time.
Score the Skin First
Use a sharp knife to score the skin in a crosshatch pattern, cutting through the fat but not into the meat. This opens channels for the fat to escape and helps the skin lie flat. Space the cuts about a half-inch apart. Pat the skin bone-dry before it hits the pan.
How Do You Cook Duck Breast to the Right Temperature?
Duck is a red meat, not a white one, so it doesn’t follow chicken’s rules. The USDA and most culinary authorities recommend pulling duck breast at 130 to 135°F internal temperature for a rosy medium-rare. ([USDA FoodData Central](https://fdc.nal.usda.gov), 2023) Push it past 145°F and the lean meat turns dry and livery. A quick-read thermometer is your best friend here.
The skin side does most of the work. You’ll spend roughly 6 to 8 minutes rendering skin-side down, then just 2 to 3 minutes on the flesh side to finish. Carryover heat during the rest pushes the final temperature up another 3 to 5 degrees, so pull it a touch early.
[UNIQUE INSIGHT] Most home cooks overcook duck because they treat it like chicken. The fear of pink poultry runs deep. But duck’s muscle structure and lower salmonella risk profile make medium-rare both safe and far more pleasant. Trust the thermometer, not the instinct that says pink equals raw.
The Rest Is Not Optional
Let the duck rest for 5 to 10 minutes on a cutting board after cooking. This pause lets the juices, driven to the center by the heat, redistribute through the meat. Slice too soon and those juices run onto the board instead of staying in each bite. Tent loosely with foil to hold the heat.
Ingredients
This recipe uses pantry-friendly ingredients with one star purchase: good duck breasts. Duck has grown steadily more available in American markets, with U.S. duck production reaching roughly 27 million birds annually in recent years. ([National Agricultural Statistics Service, USDA](https://www.nass.usda.gov), 2022) Look for Pekin or Moulard breasts at a butcher or the freezer aisle of larger grocery stores.
For the Duck
- 2 boneless duck breasts (about 6 to 8 oz each), skin on
- Kosher salt
- Freshly ground black pepper
- 2 sprigs fresh thyme (optional)
For the Cherry Port Sauce
- 1 cup fresh or frozen pitted cherries (halved)
- ½ cup ruby port
- ½ cup chicken or beef stock
- 1 small shallot, finely minced
- 1 tablespoon balsamic vinegar
- 1 tablespoon cold butter
- Salt to taste
Step-by-Step: Searing the Duck Breast
Precision matters more than speed with duck. A 2021 review by America’s Test Kitchen found that gradual fat rendering produced measurably crisper skin and more evenly cooked meat than high-heat searing across repeated tests. ([America’s Test Kitchen](https://www.americastestkitchen.com), 2021) Follow the order below and you’ll hit medium-rare with crackling skin on the first try.
- Score and season. Crosshatch the skin without cutting into the meat. Pat completely dry, then season both sides generously with salt and pepper. Let the duck sit at room temperature for 15 minutes.
- Start cold. Place the breasts skin-side down in a cold, dry stainless or cast-iron skillet. Turn the heat to medium. No oil needed; the duck renders its own fat.
- Render slowly. Cook skin-side down for 6 to 8 minutes. Spoon off excess fat into a heatproof jar as it pools (save it for roasting potatoes). The skin should turn deep golden and crisp.
- Flip and finish. Turn the breasts and cook flesh-side down for 2 to 3 minutes, adding thyme to the pan. Check the internal temperature; pull at 130 to 135°F.
- Rest. Move the duck to a cutting board, skin-side up, and rest 5 to 10 minutes before slicing.
How Do You Make the Cherry Port Sauce?
The sauce uses the same pan and a spoonful of the rendered duck fat, so nothing goes to waste. Reducing the port concentrates its sugars and deepens the flavor, a process rooted in simple evaporation chemistry described in Harold McGee’s On Food and Cooking. ([Harold McGee, On Food and Cooking](https://www.haroldmcgee.com), 2004) Cherries add sweetness and a jammy body that clings to each slice of duck.
- Sweat the shallot. Pour off all but 1 tablespoon of duck fat. Add the minced shallot and cook over medium heat for 1 to 2 minutes until soft.
- Deglaze. Pour in the port, scraping up the browned bits. Let it bubble and reduce by half, about 3 minutes.
- Build the sauce. Add cherries, stock, and balsamic vinegar. Simmer for 4 to 5 minutes until slightly thickened and glossy.
- Finish with butter. Off the heat, swirl in the cold butter for shine. Season with salt to taste.
If the sauce reduces too far, loosen it with a splash of stock. Too thin? Simmer another minute. It should coat the back of a spoon.
Tips for Restaurant-Quality Duck at Home
Small details separate good duck from great duck. According to Cook’s Illustrated testing, drying the skin thoroughly and seasoning ahead of time improves both crispness and flavor penetration in seared meats. ([Cook’s Illustrated](https://www.cooksillustrated.com), 2020) These habits cost no extra effort and pay off on the plate.
- Dry skin is crisp skin. Pat the duck dry, and for best results, leave it uncovered in the fridge for a few hours before cooking.
- Save the fat. Rendered duck fat keeps in the fridge for weeks and makes the best roast potatoes you’ll ever eat.
- Use a thermometer. Guessing leads to overcooking. A digital probe takes the risk out entirely.
- Slice against the grain. Cut thin slices on a bias for the most tender bite.
- Match the wine. The same ruby port in the sauce pairs beautifully in the glass.
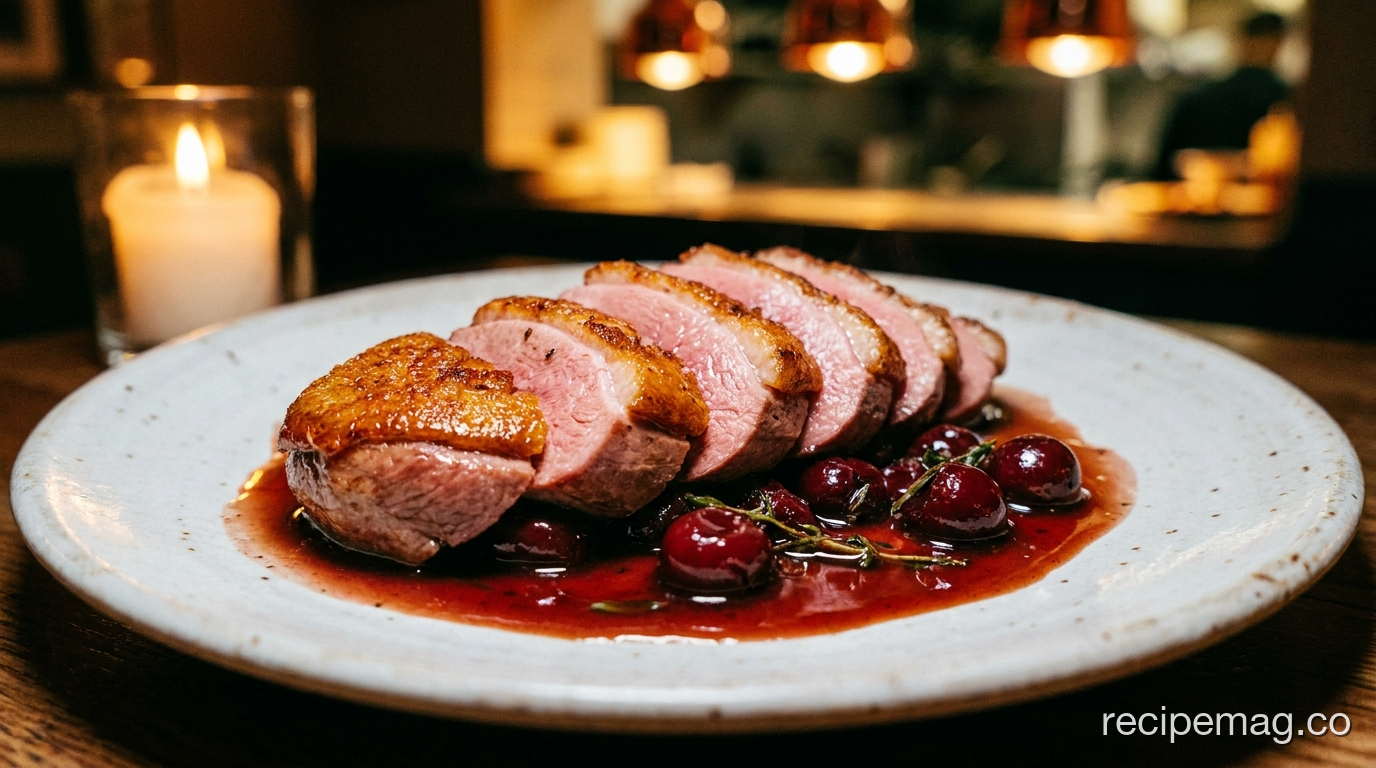
Pan-Seared Duck Breast with Cherry Port Sauce
Prep Time: 10 minutes | Cook Time: 15 minutes | Rest: 10 minutes | Serves: 2
Ingredients
Duck
- 2 boneless duck breasts (6 to 8 oz each), skin on
- Kosher salt
- Freshly ground black pepper
- 2 sprigs fresh thyme (optional)
Cherry Port Sauce
- 1 cup pitted cherries, halved (fresh or frozen)
- ½ cup ruby port
- ½ cup chicken or beef stock
- 1 small shallot, finely minced
- 1 tablespoon balsamic vinegar
- 1 tablespoon cold butter
- Salt to taste
Instructions
- Score the duck skin in a crosshatch pattern, cutting through fat but not meat. Pat dry and season both sides with salt and pepper. Rest at room temperature 15 minutes.
- Place duck skin-side down in a cold, dry skillet. Turn heat to medium. Render 6 to 8 minutes, spooning off excess fat, until skin is deep golden and crisp.
- Flip the breasts, add thyme, and cook flesh-side down 2 to 3 minutes, until the internal temperature reads 130 to 135°F.
- Rest the duck skin-side up on a cutting board for 5 to 10 minutes.
- Pour off all but 1 tablespoon of fat. Sweat the shallot 1 to 2 minutes. Add port and reduce by half, about 3 minutes.
- Add cherries, stock, and balsamic. Simmer 4 to 5 minutes until glossy. Off heat, swirl in cold butter and season with salt.
- Slice the duck thin against the grain. Spoon cherry port sauce over or alongside and serve.
Notes
- Pull the duck at 130 to 135°F; carryover heat adds a few degrees during the rest.
- Save the rendered duck fat in a jar for roasting potatoes or vegetables.
- No port? Substitute a dry red wine plus 1 teaspoon honey.
- For crispier skin, dry the scored duck uncovered in the fridge for a few hours before cooking.
Frequently Asked Questions About Pan-Seared Duck Breast
Do you cook duck breast skin-side down first?
Yes, always start skin-side down. Placing the duck skin-side down in a cold pan lets the thick fat layer render slowly as the heat rises. This crisps the skin without overcooking the meat. You’ll spend 6 to 8 minutes on the skin and only 2 to 3 minutes finishing the flesh side. Spoon off the rendered fat as it collects so the skin browns rather than fries.
What temperature should duck breast be cooked to?
Pull duck breast at an internal temperature of 130 to 135°F for medium-rare, the doneness most chefs and the USDA recommend for this red meat. ([USDA FoodData Central](https://fdc.nal.usda.gov), 2023) Unlike chicken, duck does not need to reach 165°F. Carryover heat during a 5 to 10 minute rest will raise the temperature a few more degrees, so pull it slightly early for a perfectly rosy center.
Can I make the cherry port sauce ahead of time?
Yes. Make the sauce up to three days ahead and store it in a sealed container in the fridge, holding off on the final butter swirl. When ready to serve, reheat gently over low heat, then whisk in the cold butter for shine and a glossy finish. Loosen with a splash of stock if it has thickened too much in the refrigerator.
What can I serve with duck breast?
Duck pairs well with sides that balance its richness. Roasted potatoes cooked in the saved duck fat, sautéed greens, creamy polenta, or a simple arugula salad all work beautifully. The cherry port sauce already adds sweetness and acidity, so keep the sides relatively plain. A glass of the same ruby port or a medium-bodied red wine rounds out the plate nicely.
Why is my duck skin not crispy?
Soggy skin usually comes from moisture or rushing the render. Pat the skin completely dry before cooking, and score it so the fat can escape. Start in a cold, dry pan and render over medium heat for the full 6 to 8 minutes without flipping early. Spoon off pooled fat so the skin browns instead of poaching. Patience is the single most important factor here.
A pan-seared duck breast with cherry port sauce looks impressive, but it asks very little of you. Score the skin, start cold, watch the thermometer, and rest the meat. Those four habits turn an intimidating cut into a weeknight-possible dinner with restaurant polish.
The cherry port sauce is where you can play. Swap in blackberries, add a sprig of rosemary, or splash in a little orange juice for brightness. The technique stays the same no matter how you finish it.
Cook it once and the fear disappears. Duck becomes the dinner you reach for when you want something special without spending the whole evening in the kitchen.
