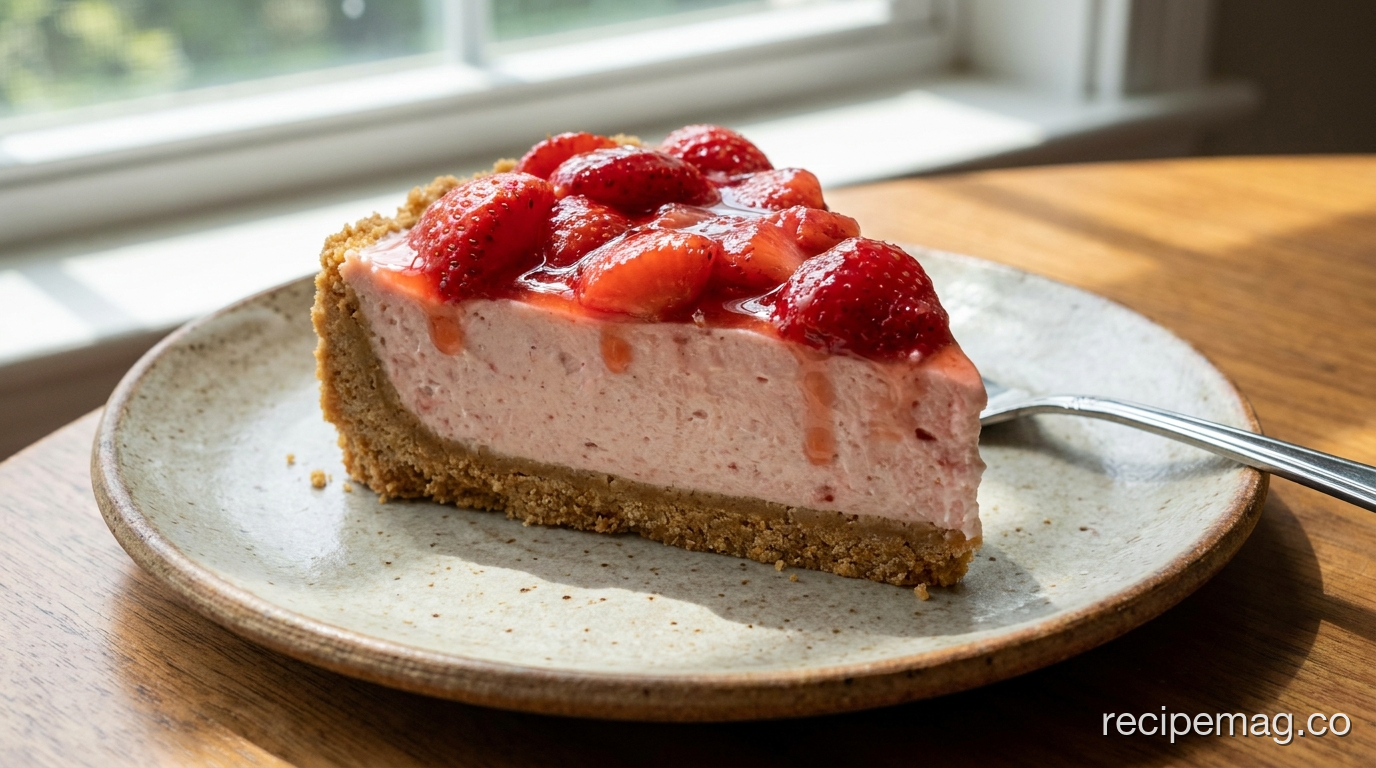
You don’t need an oven to make a cheesecake worth celebrating. This no bake strawberry cheesecake layers a buttery graham crust under a smooth cream cheese filling, then crowns it with glossy fresh strawberries. The filling sets entirely in the fridge over 4 to 6 hours, which means no water baths, no cracked tops, and no heating up the kitchen on a 90-degree June afternoon. It serves twelve, slices cleanly, and tastes like the best part of summer.
Key Takeaways
- Zero oven time: the filling sets in the fridge in 4 to 6 hours, or overnight for the cleanest slices.
- Whipped cream folded into cream cheese gives a sliceable, mousse-light filling that still holds its shape.
- Strawberries are a smart summer pick, with about 58 milligrams of vitamin C per cup. ([USDA FoodData Central](https://fdc.nal.usda.gov), 2023)
- A buttery graham crust needs only 3 ingredients and 10 minutes of chilling to firm up.
- Serves 12 and keeps in the fridge for up to 4 days.
Why Make a No-Bake Cheesecake in Summer?
No-bake desserts solve a real summer problem: nobody wants to run a hot oven when it’s already sweltering. The U.S. Department of Energy notes that ovens are among the most energy-intensive appliances in the home, and using them during the hottest hours forces your air conditioning to work harder. ([U.S. Department of Energy](https://www.energy.gov), 2023) A no bake strawberry cheesecake sidesteps all of that. You mix, you pour, you chill.
There’s a texture argument too. Baked cheesecake relies on eggs setting under gentle heat, which can crack or curdle if you rush it. This version skips eggs entirely. Instead, whipped cream and cream cheese carry the structure, giving you a lighter, almost mousse-like slice that still holds a clean edge.
And the strawberries deserve their moment. June is peak strawberry season across much of the U.S., when local berries are sweetest and cheapest. A no-bake cheesecake puts that fruit front and center instead of burying it under heat.
[PERSONAL EXPERIENCE] We’ve made this cheesecake through three summers now, and the one change that mattered most was moving from a hand-whisked filling to a properly whipped cream folded in at the end. The first version was dense and a little heavy. Folding in cream whipped to stiff peaks turned it into something you’d order at a restaurant.
What Ingredients Do You Need?
This recipe uses pantry staples and one star ingredient: fresh strawberries. Cream cheese is the backbone, and quality matters. According to the USDA, full-fat cream cheese contains roughly 34 grams of fat per 100 grams, and that fat is exactly what gives the filling its rich, sliceable body. ([USDA FoodData Central](https://fdc.nal.usda.gov), 2023) Low-fat versions hold more water and set softer, so use the full-fat block for the best result.
For the Graham Crust
- 2 cups graham cracker crumbs (about 16 full crackers)
- 7 tablespoons unsalted butter, melted
- 3 tablespoons granulated sugar
- Pinch of salt
For the No-Bake Filling
- 16 oz (two 8 oz blocks) full-fat cream cheese, softened to room temperature
- 3/4 cup powdered sugar
- 1 teaspoon vanilla extract
- 1 tablespoon fresh lemon juice
- 1 1/4 cups cold heavy whipping cream
For the Strawberry Topping
- 1 pound fresh strawberries, hulled and halved (or sliced)
- 3 tablespoons strawberry or red currant jelly, warmed (optional glaze)
- 1 teaspoon lemon juice
Soften the cream cheese fully before you start. Cold cream cheese refuses to smooth out and leaves stubborn lumps in the filling that no amount of beating will fix once the cream is in. Leave the blocks on the counter for an hour, or microwave them in 10-second bursts until they give to a spoon.
How Do You Make the Graham Cracker Crust?
A no-bake crust holds together through butter and chilling rather than baking. The ratio that works reliably is roughly 2 cups of crumbs to 7 tablespoons of melted butter. America’s Test Kitchen recommends pressing the crumbs firmly and evenly to compact them, which is what keeps the crust from crumbling when you cut into it later. ([America’s Test Kitchen](https://www.americastestkitchen.com), 2022) Firm packing is the whole game with a no-bake base.
Step-by-Step Crust Instructions
- Crush the graham crackers. Pulse them in a food processor until fine, or seal them in a bag and crush with a rolling pin. You want sandy crumbs, not chunks.
- Mix in butter, sugar, and salt. Combine the crumbs with melted butter, sugar, and a pinch of salt until the mixture looks like wet sand and clumps when you squeeze it.
- Press into the pan. Tip the mixture into a 9-inch springform pan. Press it firmly across the bottom and about an inch up the sides, using the flat base of a measuring cup to compact it.
- Chill the crust. Refrigerate for at least 30 minutes (or freeze for 10) while you make the filling. This firms the butter and locks the crust in place.
[UNIQUE INSIGHT] Most no-bake crusts fail at the cutting stage, not the mixing stage. The fix isn’t more butter, which makes the crust greasy and hard. It’s pressure. Pressing the crumbs with real force, then giving them a full half-hour in the cold, compacts them into a base that slices like a baked one. We push hard enough that the cup leaves a faint sheen on the surface.
How Do You Make the No-Bake Cream Cheese Filling?
The filling sets through fat and cold, not heat. The key step is whipping cold heavy cream to stiff peaks before folding it into the beaten cream cheese. Serious Eats explains that heavy cream whips into a stable foam only when it’s very cold, because the fat needs to stay firm enough to trap air. ([Serious Eats](https://www.seriouseats.com), 2021) That whipped structure is what lets this cheesecake set without a single egg or any gelatin.
Step-by-Step Filling Instructions
- Beat the cream cheese. In a large bowl, beat the softened cream cheese with powdered sugar, vanilla, and lemon juice until completely smooth, about 2 minutes. Scrape the bowl to catch any lumps.
- Whip the cream separately. In a second cold bowl, whip the cold heavy cream until it holds stiff peaks. The cream should stand up straight when you lift the beaters.
- Fold, don’t beat. Add the whipped cream to the cream cheese in two additions. Fold gently with a spatula until no streaks remain. Folding keeps the air you just whipped in.
- Fill the crust. Spoon the filling over the chilled crust and smooth the top with an offset spatula. Tap the pan once on the counter to settle it.
The lemon juice does quiet but important work here. It sharpens the flavor so the filling tastes like cheesecake rather than sweetened cream, and its mild acidity helps the cream cheese set a touch firmer. Don’t skip it.
How Long Does It Need to Chill to Set?
Chilling is where the magic happens, and patience pays off. Plan on a minimum of 4 to 6 hours in the refrigerator, though overnight gives the cleanest slices. Food safety guidance from the USDA recommends keeping dairy-based desserts refrigerated at 40°F or below, which is also exactly the temperature range where this filling firms up properly. ([USDA Food Safety and Inspection Service](https://www.fsis.usda.gov), 2023) Cold is doing the structural work here, so don’t cut it short.
For a quick check on whether it’s ready: give the pan a gentle wiggle. A set cheesecake jiggles as one firm mass, not as a loose, sloshing center. If the middle still moves like liquid, it needs more time. Warm filling will slump the moment you release the springform.
Why Overnight Is Worth It
An overnight chill does two things a 4-hour chill can’t. It firms the crust fully so it holds its shape under the knife, and it lets the flavors settle and deepen. If you’re serving this for a gathering, make it the night before. The cheesecake is genuinely better on day two, and you free up your kitchen the day of.
How Do You Make the Strawberry Topping?
The topping is where summer berries shine, and it takes five minutes. Fresh strawberries are worth featuring: a single cup delivers about 58 milligrams of vitamin C, more than a medium orange, along with fiber and antioxidants. ([USDA FoodData Central](https://fdc.nal.usda.gov), 2023) For this cheesecake, you want them fresh and glossy on top, not cooked down into a sauce that would weep into the filling.
Step-by-Step Topping Instructions
- Prep the berries. Hull and halve (or slice) the strawberries. Pat them dry so excess moisture doesn’t slide off the filling.
- Make the optional glaze. Warm 3 tablespoons of strawberry or red currant jelly with a teaspoon of lemon juice until liquid. This gives the berries a bakery-style shine.
- Toss and top. Brush or gently toss the berries with the warm glaze, then arrange them over the chilled cheesecake just before serving.
- Add right before serving. For the best look, top the cheesecake within an hour of serving so the berries stay bright and the filling stays firm.
If you’d rather have a saucier finish, simmer half the strawberries with a tablespoon of sugar and a squeeze of lemon for five minutes, then cool and spoon it over the fresh berries. Either way, keep the topping separate from the filling until close to serving time.
Tips for the Best No-Bake Strawberry Cheesecake
Small choices separate a good no-bake cheesecake from a great one. The most common failure is a filling that won’t set, and it almost always traces back to under-whipped cream or warm cream cheese. Get those two right and the rest is easy. These tips come from making this dessert dozens of times.
- Room-temperature cream cheese, cold cream. The cream cheese must be soft to blend smoothly. The cream must be cold to whip. Mixing those up is the number one reason fillings turn out lumpy or loose.
- Don’t overbeat the filling after folding. Once the whipped cream goes in, fold gently. Aggressive mixing deflates the air and you lose the light texture.
- Use a springform pan. It releases the cheesecake cleanly. Run a thin knife around the edge before unlatching the ring.
- Slice with a hot knife. Dip your knife in hot water and wipe it dry between cuts for clean, professional-looking slices.
- Keep the topping fresh. Add strawberries close to serving. Berries left on overnight release water that softens the surface.
- Make it ahead. The cheesecake (without topping) holds in the fridge for up to 4 days, making it ideal for parties.
—
No-Bake Strawberry Cheesecake
Prep Time: 25 minutes | Chill Time: 4 to 6 hours (or overnight) | Serves: 12
Ingredients
Graham Crust
- 2 cups graham cracker crumbs (about 16 full crackers)
- 7 tablespoons unsalted butter, melted
- 3 tablespoons granulated sugar
- Pinch of salt
No-Bake Filling
- 16 oz full-fat cream cheese, softened
- 3/4 cup powdered sugar
- 1 teaspoon vanilla extract
- 1 tablespoon fresh lemon juice
- 1 1/4 cups cold heavy whipping cream
Strawberry Topping
- 1 pound fresh strawberries, hulled and halved
- 3 tablespoons strawberry or red currant jelly, warmed (optional)
- 1 teaspoon lemon juice
Instructions
- Make the crust: combine graham crumbs, melted butter, sugar, and salt until it resembles wet sand. Press firmly into the bottom and up the sides of a 9-inch springform pan. Refrigerate at least 30 minutes.
- Beat the filling base: beat softened cream cheese with powdered sugar, vanilla, and lemon juice until completely smooth, about 2 minutes.
- Whip the cream: in a separate cold bowl, whip the cold heavy cream to stiff peaks.
- Fold: gently fold the whipped cream into the cream cheese mixture in two additions until no streaks remain.
- Fill: spoon the filling over the chilled crust and smooth the top. Tap the pan once to settle.
- Chill: refrigerate 4 to 6 hours, or overnight, until firm and set.
- Top: just before serving, toss strawberries with warm jelly and lemon juice, then arrange over the cheesecake.
- Release the springform, slice with a hot, dry knife, and serve cold.
Notes
- Cream cheese must be fully softened; cold cream cheese leaves lumps. The heavy cream must be cold to whip properly.
- Make ahead: the cheesecake (without topping) keeps refrigerated for up to 4 days. Add berries close to serving.
- For cleaner slices, chill overnight and dip the knife in hot water between cuts.
- No food processor? Crush graham crackers in a zip-top bag with a rolling pin.
—
Frequently Asked Questions About No-Bake Strawberry Cheesecake
Why didn’t my no-bake cheesecake set?
The two usual culprits are under-whipped cream and warm cream cheese. The heavy cream must reach stiff peaks to provide structure, and the cream cheese must be full-fat and properly blended. Low-fat cream cheese holds too much water to set firmly. If your filling is loose, it almost always needs more chill time or firmer whipped cream next round. Give it the full 6 hours minimum.
Can I make this cheesecake ahead of time?
Yes, and you should. The cheesecake needs at least 4 to 6 hours to set, so making it the night before is ideal. The filling (without the strawberry topping) keeps well covered in the refrigerator for up to 4 days. Add the fresh strawberries within an hour of serving so they stay glossy and the surface stays firm. Make-ahead actually improves the texture and flavor.
Do I need gelatin for a no-bake cheesecake?
No. This recipe sets through whipped cream and full-fat cream cheese rather than gelatin. Properly whipped cream creates a stable structure that firms up in the cold. Some recipes add gelatin for an extra-firm, sliceable result, especially in warm climates, but it isn’t required here. If you want a firmer set for an outdoor summer party, you can bloom and add a teaspoon of gelatin to the filling.
Can I use frozen strawberries for the topping?
Fresh strawberries are best for the topping because they stay glossy and hold their shape. Frozen strawberries release a lot of water as they thaw, which would weep onto the filling. If fresh aren’t available, cook thawed frozen strawberries into a quick sauce with a little sugar and lemon, cool it fully, and spoon it over just before serving. Keep that sauce off the filling until serving time.
What pan should I use for no-bake cheesecake?
A 9-inch springform pan is ideal because the sides release cleanly without flipping the cheesecake. If you don’t have one, use a pie dish or a square baking pan lined with parchment paper, leaving an overhang so you can lift the cheesecake out. A deep dish works too, though slices won’t be as tidy. Run a knife around the edge before releasing any pan.
This no bake strawberry cheesecake is summer dessert at its easiest: no oven, no eggs, no stress. The graham crust, creamy filling, and bright strawberry topping come together with little more than a mixer and a few hours of patience in the fridge.
Make it the night before your next cookout or family dinner. By the time you’re ready to serve, the only work left is arranging strawberries on top and slicing it cold. It’s the kind of dessert that disappears fast and gets asked about often.
Start with cold cream and soft cream cheese, press that crust firmly, and let the fridge do the rest. Summer doesn’t get much sweeter than this.
