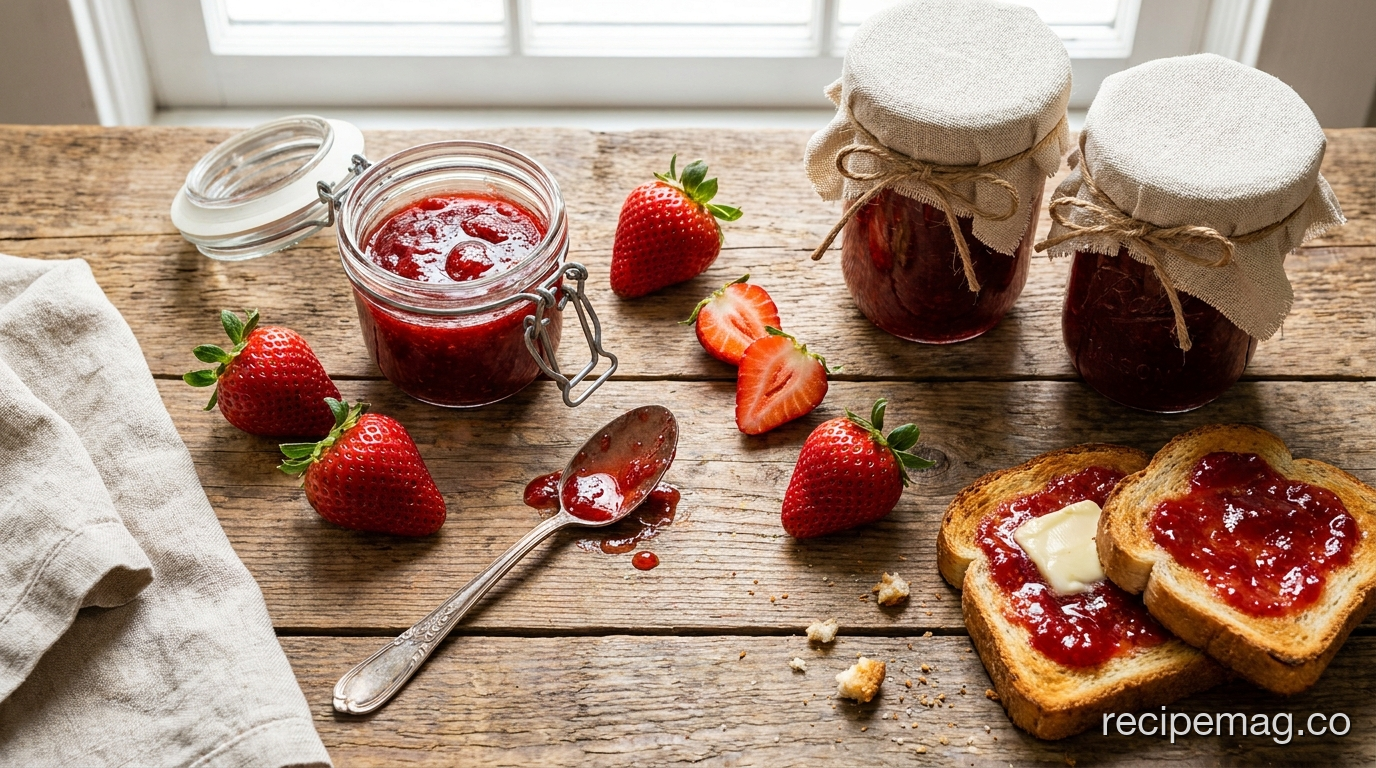
Making homemade strawberry jam takes about 45 minutes of active work and turns two pounds of ripe berries into roughly five half-pint jars. The process is simple: cook crushed strawberries with sugar and pectin to 220°F, then seal them in a boiling water bath. Done right, those jars stay shelf-stable for up to 18 months, according to the USDA’s National Center for Home Food Preservation (NCHFP, 2024). Here’s exactly how to do it.
Key Takeaways
- Two pounds of strawberries plus four cups of sugar yields about five half-pint jars of jam.
- Jam must reach 220°F (the gel point) to set properly without runniness.
- A 10-minute boiling water bath makes jars shelf-stable for up to 18 months per the NCHFP.
- Use slightly underripe berries for natural pectin; fully ripe ones for sweetness.
- Never reduce sugar in a traditional recipe below the level the pectin requires, or the jam won’t set.
What Ingredients Do You Need for Strawberry Jam?
Four ingredients carry the entire recipe: strawberries, sugar, pectin, and lemon juice. The USDA’s National Center for Home Food Preservation publishes tested ratios for strawberry jam and warns that changing them can stop the jam from setting (NCHFP, 2024). Each ingredient does a specific job, and skipping one changes the result.
The shopping list
- 2 lbs fresh strawberries (about 4 cups crushed)
- 4 cups granulated sugar
- 1 box (1.75 oz) powdered fruit pectin
- 2 tablespoons bottled lemon juice
- 1/2 teaspoon butter (optional, reduces foaming)
Use bottled lemon juice, not fresh, for canning. Bottled juice has a standardized acidity, while fresh lemons vary batch to batch. That acidity matters for safe preservation. Sugar does more than sweeten here. It binds free water so the pectin can form a gel, which is why low-sugar recipes need special pectin formulated for the job.
How Do You Pick the Best Strawberries for Jam?
The best jam berries are deeply colored, fragrant, and a mix of fully ripe and slightly underripe fruit. Underripe strawberries carry more natural pectin and acid, which help the jam set, while ripe ones bring sweetness and aroma (UMaine Cooperative Extension, 2023). Aim for roughly a 3-to-1 ratio of ripe to underripe.
Smell is your best test at the market. A strawberry that smells like nothing will taste like nothing. June berries from a local farm are smaller and far more flavorful than the large hothouse varieties sold in winter. Avoid any with white shoulders, soft spots, or visible mold, since one bad berry can sour a whole batch.
[PERSONAL EXPERIENCE] We’ve found that jam made the same day berries are picked sets faster and tastes brighter than jam from supermarket fruit that’s already a week old. The pectin in older strawberries breaks down as they sit, so fresher fruit simply behaves better in the pot.
Step-by-Step: How to Make Strawberry Jam from Scratch
This is the core of the process. Read all the steps before you start, because jam moves fast once it boils. Have your jars sterilized and your equipment ready before the first berry hits the pot.
Prep time: 20 minutes | Cook time: 25 minutes | Yield: about 5 half-pint jars
Equipment you’ll need
- Large heavy-bottomed pot (8-quart or larger)
- Boiling water canner or deep stockpot with a rack
- 5 half-pint canning jars with new lids and bands
- Jar lifter and a candy or instant-read thermometer
- Potato masher and a ladle
The instructions
- Sterilize the jars. Wash jars in hot soapy water, then keep them hot in simmering water until you fill them. New lids should be warmed, not boiled.
- Prepare the fruit. Hull and crush the strawberries one layer at a time with a potato masher. You want texture, not puree. Measure out exactly 4 cups of crushed fruit.
- Combine fruit and pectin. Add the crushed strawberries, lemon juice, and powdered pectin to your large pot. Stir in the optional butter to cut foaming.
- Bring to a rolling boil. Over high heat, stir constantly until the mixture reaches a boil that can’t be stirred down. This activates the pectin.
- Add the sugar all at once. Pour in all 4 cups of sugar, stirring to dissolve. Return to a full rolling boil.
- Boil hard for 1 minute. Keep stirring. The jam should reach 220°F on your thermometer, which is the gel point at sea level.
- Test the set. Drop a spoonful on a chilled plate. If it wrinkles when you push it, it’s ready. If it runs, boil another minute.
- Skim and fill. Skim any foam, then ladle hot jam into hot jars, leaving 1/4 inch of headspace at the top.
- Seal and process. Wipe the rims, set the lids, and screw on bands fingertip-tight. Process in a boiling water bath (see the next section).
[UNIQUE INSIGHT] Most home cooks overcook jam out of fear it won’t set. In our experience, the thermometer is more reliable than the eye. Pulling the pot the moment it hits 220°F gives a softer, brighter jam, while boiling “just a little longer” pushes it toward a stiff, candied texture that mutes the fruit.
How Do You Safely Can Strawberry Jam?
Safe canning means a full boiling water bath, not just hot jars and tight lids. The USDA’s NCHFP recommends processing strawberry jam in boiling water for at least 10 minutes to destroy mold and yeast and to form a vacuum seal (NCHFP, 2024). Adjust the time upward at higher altitudes, since water boils at a lower temperature.
The water-bath process
- Lower filled, sealed jars into a canner of boiling water using a jar lifter. Water should cover the jars by at least 1 inch.
- Process for 10 minutes at altitudes below 1,000 feet. Add 5 minutes for 1,001 to 6,000 feet, and 10 minutes above that.
- Turn off the heat and let jars rest 5 minutes before lifting them out.
- Set jars on a towel and leave them undisturbed for 12 to 24 hours.
- Check the seal: the lid should be concave and shouldn’t flex when pressed. Refrigerate any jar that didn’t seal.
Strawberry jam is a high-acid food, which is why a water bath is enough and a pressure canner isn’t needed. That acidity, helped by the bottled lemon juice, blocks the growth of Clostridium botulinum. Never improvise with low-acid additions like extra vegetables or low-sugar swaps unless the recipe was specifically tested for them.
Why Won’t My Jam Set? Common Problems Solved
The most common reason jam stays runny is undercooking. Penn State Extension reports that jam usually fails to set because it never reached the 220°F gel point or because the fruit, sugar, and pectin weren’t measured precisely (Penn State Extension, 2023). The good news is that most problems are fixable.
Runny jam
If your jam is soupy after 24 hours, it can be re-cooked. Return it to the pot, add a little more pectin dissolved in water, and boil hard to 220°F again. Measure carefully this time, since too much fruit relative to pectin is the usual culprit.
Jam that’s too stiff
Overcooked jam turns rubbery because the pectin set too hard and the sugar started to caramelize. You can’t reverse it, but you can warm a stiff jam with a splash of water to loosen it for spreading or use it stirred into yogurt and oatmeal.
Mold or off smells
Discard any jar that smells fermented, shows mold, or has a lid that popped up. Don’t scrape mold off and eat the rest, since the spores can run deeper than they look. A properly sealed, processed jar should never reach this point within its 18-month window.
How Long Does Homemade Strawberry Jam Last?
Sealed and water-bath processed, homemade strawberry jam keeps in a cool, dark pantry for up to 18 months, per NCHFP storage guidance (NCHFP, 2024). Once you open a jar, refrigerate it and use it within three weeks. Unprocessed “refrigerator jam” skips the canning step entirely and lasts about a month in the fridge.
Store sealed jars away from sunlight and heat, which fade the color and degrade flavor over time. A basement shelf or a closed cabinet works well. Label each jar with the date you made it, since a year’s worth of nearly identical red jars gets confusing fast.
For long-term storage without canning, freezer jam is the easiest route. Made with special freezer pectin and no cooking, it preserves the fresh-picked taste of raw strawberries and keeps in the freezer for up to a year. It’s the best option if water-bath canning feels like more than you want to take on this season.
Frequently Asked Questions About Homemade Strawberry Jam
Can I make strawberry jam without pectin?
Yes, but it takes longer and requires more sugar and lemon juice. Without added pectin, you rely on the fruit’s natural pectin and a longer boil to reach the gel point, often 30 to 40 minutes. The result is a softer, more rustic set. Adding a chopped apple or extra underripe berries boosts the natural pectin available.
Why is my homemade strawberry jam runny?
The usual cause is undercooking. Jam must reach 220°F at sea level to gel, so a thermometer helps. Other causes include using overripe berries that are low in pectin or measuring sugar and fruit inaccurately. Per Penn State Extension, runny jam can be re-cooked with a bit more pectin and boiled again to the correct temperature.
Do I have to use a water bath canner?
Only if you want shelf-stable jars stored at room temperature. The USDA’s NCHFP recommends a 10-minute boiling water bath for safe long-term storage. If you’d rather skip canning, make refrigerator or freezer jam instead. Both are unprocessed, taste fresh, and keep for a few weeks in the fridge or up to a year frozen.
How much jam does two pounds of strawberries make?
About five half-pint jars, or roughly 2.5 pints total. Two pounds of whole berries yields close to 4 cups once hulled and crushed. The added sugar increases the final volume, so your actual yield lands a little higher than the fruit alone would suggest. Always prepare one extra jar in case a batch runs long.
Can I reduce the sugar in strawberry jam?
Not in a traditional recipe. Sugar binds water and helps the pectin set, so cutting it leaves you with runny jam. To make a lower-sugar version, use pectin specifically formulated for low or no sugar, such as the calcium-activated type. Follow that product’s tested instructions exactly, since the chemistry differs from standard pectin.
Start Your First Batch This Weekend
Strawberry season is short, and the best berries for jam are in the market right now. A single afternoon turns a few pounds of June fruit into jars you’ll be opening in December, when fresh strawberries are a distant memory and a spoonful of summer on toast feels like a small miracle.
Keep it simple for your first batch. Follow the tested ratios, watch your thermometer for that 220°F gel point, and give the jars their full water bath. Once you’ve made one successful batch, you’ll understand the rhythm well enough to branch into low-sugar versions, mixed berry blends, and freezer jam.
The whole point of homemade jam is capturing fruit at its peak and stretching that flavor across the year. Buy good berries, work cleanly, and trust the process. Your pantry, and your morning toast, will thank you.
