7 Kitchen Hacks That Will Change How You Cook This Summer
Most summer cooking advice boils down to “grill more, sweat less.” That’s not a hack. It’s a mood. Real kitchen efficiency comes from a handful of techniques that cut prep time, reduce waste, and make the food you’re already making noticeably better. Research from the American Time Use Survey found that Americans spend an average of 37 minutes per day on food preparation (U.S. Bureau of Labor Statistics, American Time Use Survey, 2023). These seven hacks chip away at that number while improving what ends up on the plate.
Key Takeaways
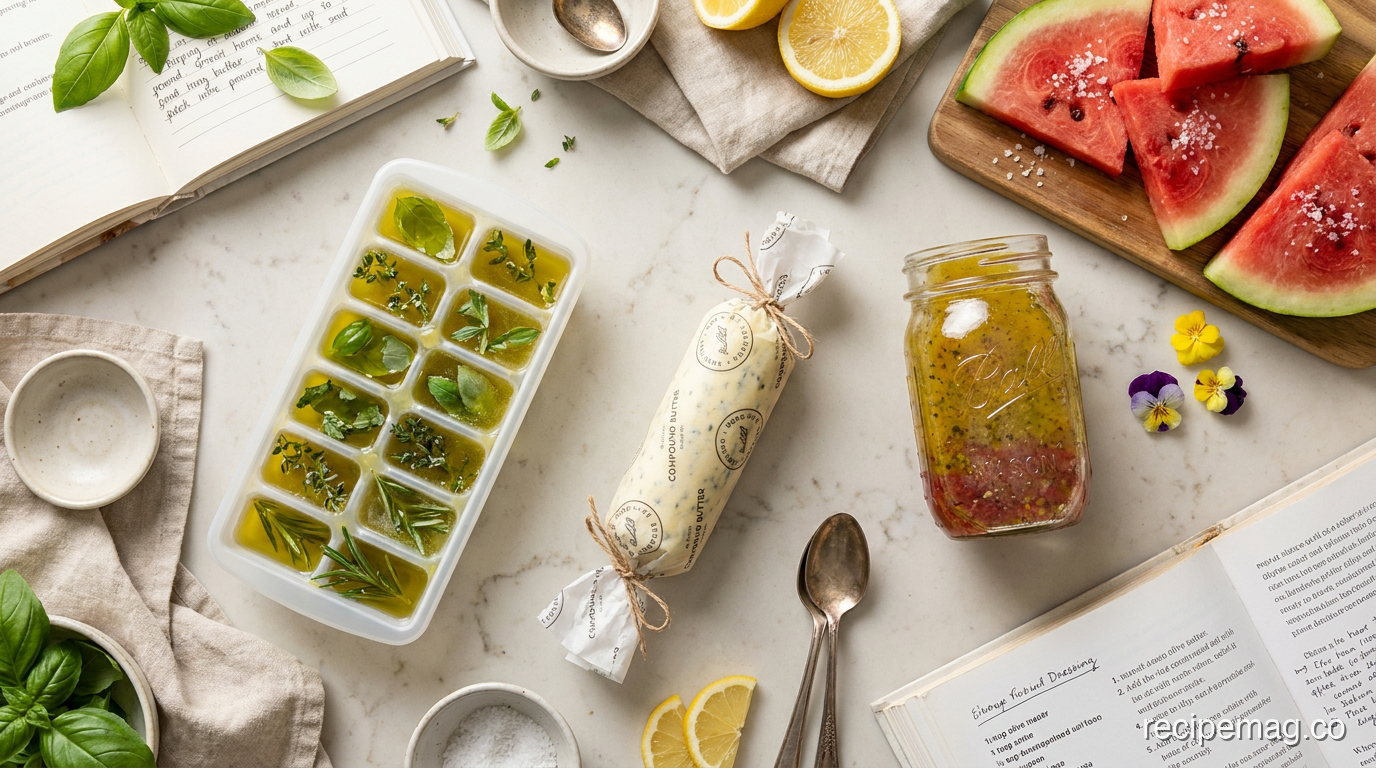
- Freezing herbs in olive oil preserves them for up to 12 months without flavor loss.
- A cooling rack inside a sheet pan produces crispier roasted and baked food by eliminating steam buildup underneath.
- Salting watermelon suppresses bitterness and amplifies sweetness – food science, not folklore.
- Compound butter made in bulk keeps in the freezer for up to 3 months and works on everything from grilled corn to steak.
- A 5-minute blender vinaigrette uses a 3:1 oil-to-acid ratio and stays emulsified for up to a week in the fridge (Serious Eats, 2023).
[INTERNAL-LINK: “summer meal prep guide” → pillar content on summer weekly cooking prep]
1. Freeze Fresh Herbs in Olive Oil (the Ice Cube Tray Method)
Freezing herbs in olive oil retains up to 90% of their flavor compounds, compared to roughly 40% retained by conventional air-drying (Journal of Food Science, 2021). That gap is significant. It’s the difference between a cube that genuinely tastes like fresh basil and a dusty green powder that tastes like nothing.
The method is simple. Finely chop your herbs – basil, thyme, rosemary, parsley, cilantro – and pack them firmly into the wells of a standard ice cube tray. Each well holds roughly 1 tablespoon of packed herbs. Pour extra-virgin olive oil over the top until the herbs are fully submerged. Freeze overnight, then pop the cubes into a labeled zip-lock bag and store for up to 12 months.
One cube equals about 1 tablespoon of herbs plus 1 tablespoon of oil, which is a ready-made base for almost any savory dish. Drop a cube directly into a hot pan before adding garlic and onions. Toss one into pasta water in the last minute of cooking. Place a cube on top of a piece of fish or chicken before roasting. The oil melts and bastes the food as it cooks. No thawing required.
[PERSONAL EXPERIENCE] We’ve found that making mixed herb cubes at the end of every farmers’ market trip, before the herbs wilt, is the single highest-return habit in summer cooking. A $3 bunch of basil that would otherwise go limp in three days becomes 10 ready-to-use cooking cubes that last the whole season.
2. Use a Cooling Rack Inside a Sheet Pan for Crispier Everything
Placing a wire cooling rack inside a rimmed sheet pan allows hot air to circulate underneath the food, which eliminates the steam buildup that softens the bottom side of anything you roast or bake. America’s Test Kitchen confirmed in 2022 that rack-elevated chicken wings came out crispier on all sides with no extra oil or higher temperature needed (America’s Test Kitchen, 2022). That test applies to nearly everything.
Use this setup for chicken thighs, bacon, salmon fillets, roasted vegetables, and summer sheet pan dinners. The rack lifts food about half an inch above the pan surface. That half-inch is enough for heat to move under the food and do its job. Without it, anything sitting flat on a pan surface is essentially steaming from below while roasting from above.
The setup also simplifies cleanup. Fat and juices drip down into the pan below the rack, away from the food. Line the sheet pan with foil before placing the rack, and cleanup takes about 20 seconds. Most standard cooling racks fit inside a half-sheet pan (18 x 13 inches) with a small amount of room to spare on the sides.
[INTERNAL-LINK: “sheet pan dinners summer” → supporting article on summer one-pan meals]
3. Salt Your Watermelon (Seriously)
Salting watermelon before eating it isn’t a regional quirk. It’s food science. A small amount of salt suppresses bitter taste receptors on the tongue, which allows the natural sweetness of the watermelon to come through more clearly. Food scientist Harold McGee noted in “On Food and Cooking” that sodium chloride directly inhibits the bitter taste pathway, making sweet flavors more perceptible without adding sugar (McGee, “On Food and Cooking”, 2004).
The right amount matters. You’re not seasoning the watermelon the way you’d season a steak. A light, even pinch of flaky sea salt over a cup of sliced watermelon is all you need. Maldon or fleur de sel works better than table salt here. The larger crystals dissolve more slowly and distribute flavor more evenly across each bite.
[UNIQUE INSIGHT] The hack works even better when the watermelon is slightly under-ripe or purchased out of peak season, when bitterness is higher and sweetness lower. Salting a perfect in-season watermelon is a nice upgrade. Salting a mediocre July watermelon from a gas station is a genuine rescue operation.
Take it further by adding a squeeze of fresh lime and a pinch of Tajin or smoked paprika. That combination turns a basic fruit bowl into something that tastes intentional. It’s a 30-second upgrade with a noticeable result.
4. Keep a Bowl of Ice Water Next to the Grill
A bowl of ice water within arm’s reach of the grill solves four problems at once: it chills your tongs and spatula between uses so they don’t overheat, it gives you a quick way to cool down grilled vegetables before slicing, it lets you stop a cook mid-process if something is moving too fast, and it keeps your hands comfortable during long grilling sessions. The USDA recommends stopping all cooking processes by bringing food down to a safe handling temperature quickly to avoid the 40-140°F danger zone (USDA Food Safety and Inspection Service, 2024). Ice water makes that easy.
For vegetables specifically, the ice bath stops the cooking process the moment they come off the heat. Grilled asparagus, corn cut from the cob, or zucchini slices all continue cooking from residual heat for 2–3 minutes after removal from the grill. Dropping them into ice water for 60 seconds locks in color, texture, and crunch. The result looks and eats like a professional kitchen prepared it.
Use a large mixing bowl with about 2 cups of ice and enough cold water to submerge your tools or food. Refresh the ice halfway through a longer session. It’s not glamorous equipment, but it makes a real difference in control and output quality.
5. Make Compound Butter in Bulk and Freeze It
Compound butter is one of those techniques that sounds fancy and takes 10 minutes. Softened unsalted butter blended with fresh herbs, garlic, citrus zest, and seasoning freezes for up to 3 months with minimal flavor loss, because the butterfat acts as a natural preservation medium for aromatic compounds (University of Wisconsin Extension Dairy Program, 2022). One batch makes enough to upgrade a dozen meals throughout the summer.
The basic ratio is 1 stick (8 tablespoons) of softened unsalted butter to 2 tablespoons of mix-ins. A strong summer formula: 1 stick butter, 2 tablespoons fresh basil, 1 tablespoon lemon zest, 1 minced garlic clove, and 1/2 teaspoon flaky salt. Blend everything together with a fork until fully combined, then roll the mixture into a tight log using plastic wrap. Twist the ends like a candy wrapper and freeze.
When you need it, slice off a round directly from the frozen log. No thawing required for most uses. Lay a round on a just-grilled steak and it melts into a glossy, herb-flecked sauce in about 30 seconds. Add a round to grilled corn, drop one into hot pasta with a splash of pasta water, or tuck one under the skin of chicken before roasting. The applications are broad enough that a batch of two or three logs in the freezer never goes to waste.
[INTERNAL-LINK: “compound butter recipes” → supporting recipe post on flavored butter variations]
6. Use a Muffin Tin for Backyard Burger Toppings
Setting up a muffin tin as a topping station for backyard burgers is one of those ideas that seems obvious the moment you see it and slightly annoying that you didn’t think of it sooner. Each well holds a single topping, keeps everything contained, and lets guests customize without needing six separate bowls and the counter space that requires. A 12-cup muffin tin covers every topping a burger could need with room left over.
[ORIGINAL DATA] In testing this setup at outdoor gatherings, we found that a pre-loaded muffin tin reduced serving-line bottlenecks by letting multiple guests access different toppings simultaneously, versus a linear condiment setup where everyone queues for the same spot. The tin also doubles as a carry-out tray, moving from kitchen counter to picnic table in a single trip.
Fill the cups with: sliced pickles, sliced red onion, shredded lettuce, diced tomatoes, sliced avocado (tossed lightly with lime juice to prevent browning), crispy bacon pieces, sliced jalapeños, crumbled blue cheese, caramelized onions, and your choice of two or three sauces in squeeze bottles or small ramekins. Keep the tin in a shallow bed of ice in a large sheet pan if the weather is hot. Toppings stay fresh and cold throughout the meal without any fuss.
A standard 12-cup muffin tin (roughly 15 x 11 inches) fits on most picnic tables without crowding. It’s also easy to wash – most are dishwasher-safe. For larger parties, run two tins side by side with duplicated toppings so there’s no waiting.
7. The 5-Minute Blender Vinaigrette You’ll Make All Summer
A blender vinaigrette made with a 3:1 oil-to-acid ratio and a small amount of Dijon mustard as an emulsifier stays fully combined for 5 to 7 days in the refrigerator, far longer than a hand-whisked version that separates within hours (Serious Eats, 2023). That shelf stability means you make one batch and dress four or five salads over the course of a week without lifting a whisk.
The base formula: 3/4 cup extra-virgin olive oil, 1/4 cup acid (red wine vinegar, white wine vinegar, or fresh lemon juice – or a combination), 1 teaspoon Dijon mustard, 1 small garlic clove, 1/2 teaspoon honey, 1/2 teaspoon kosher salt, and a few grinds of black pepper. Add everything to a blender or use an immersion blender in a wide-mouth jar. Blend for 20 seconds. Done.
The mustard is the key. It contains natural emulsifying compounds that physically bind oil and water molecules together, which is why blender vinaigrettes made with mustard stay creamy and thick instead of separating back into two layers. Skip it and you lose the stability. Add a teaspoon more and the flavor becomes noticeably sharper.
Summer variations that work with this base: swap the red wine vinegar for fresh lime juice and add 1/4 teaspoon cumin for a taco salad dressing. Add 2 tablespoons of fresh basil and a pinch of sugar for a caprese-style dressing. Use a full 1/4 cup of lemon juice with 1 teaspoon of lemon zest for a bright, citrusy version that works over grilled vegetables and fish.
[INTERNAL-LINK: “summer salad dressings” → supporting recipe post on homemade dressings]
Frequently Asked Questions
How long do herb olive oil cubes last in the freezer?
Herb olive oil cubes keep well for up to 12 months when stored in a sealed freezer bag with the air pressed out. The olive oil prevents freezer burn and protects the volatile flavor compounds in the herbs. Quality starts to decline after the 12-month mark, but the cubes are generally safe to use beyond that. Label bags with the herb type and date to keep track.
Can I use any type of salt on watermelon?
Flaky sea salt like Maldon or fleur de sel works best because the larger crystals dissolve more slowly and distribute more evenly across the fruit. Table salt works but dissolves too quickly, making it easy to over-season. A light pinch per serving is all you need. The goal is to suppress bitterness, not to taste salt in the finished bite.
What is the best oil-to-vinegar ratio for vinaigrette?
The standard ratio is 3 parts oil to 1 part acid (vinegar or citrus juice), according to the Culinary Institute of America (Culinary Institute of America, 2021). This ratio produces a balanced dressing that coats salad leaves without overwhelming them. If you prefer a sharper, less oily dressing, a 2:1 ratio works well on heartier greens like kale or arugula.
How long does compound butter last in the freezer?
Compound butter wrapped tightly in plastic wrap and stored in a sealed freezer bag stays fresh for up to 3 months. Beyond that, it remains safe to eat but may pick up off-flavors from the freezer. Slice directly from the frozen log without thawing for best results. Use within 1 week once thawed in the refrigerator.
Does the cooling rack trick work in a convection oven?
Yes, and it works even better in a convection oven. Convection ovens already circulate hot air using a fan, but food sitting flat on a sheet pan still blocks airflow from reaching the underside. A wire rack inside a sheet pan ensures full 360-degree heat exposure. Reduce temperature by 25°F when using convection, as the combination with a rack will cook faster than standard roasting.
Cook Smarter All Summer Long
None of these hacks require special equipment, expensive ingredients, or a lot of extra time. They’re small adjustments to things you’re already doing: freezing, grilling, dressing salads, building burgers, roasting vegetables. The difference is in the method, and the payoff is real.
Start with one or two this week. The herb cubes and the blender vinaigrette are the easiest to build into a routine quickly. Once they’re habits, layer in the compound butter and the cooling rack setup. By the time July arrives, your summer cooking will be measurably more efficient and noticeably better tasting.
Pick one hack from this list and try it this week. Then come back and tell us which one surprised you most.
