Finding a quick, wholesome snack that actually keeps you full can feel impossible during a hectic workday. That is exactly why energy balls have taken the wellness world by storm. These bite-sized powerhouses deliver the perfect combination of complex carbohydrates, healthy fats, and satisfying protein.
Unlike highly processed vending machine treats, these homemade bites offer a customized approach to daily nutrition. They are incredibly easy to make, require zero baking, and can be tailored to fit almost any dietary restriction. When you incorporate them into your routine, especially alongside a 7-day weight loss meal prep plan, you eliminate the temptation of afternoon sugar crashes.
In this comprehensive guide, we will explore everything you need to master these nutritious treats in your own kitchen. You will learn the exact formula for creating the perfect texture, discover exciting flavor variations, and get expert tips for storing your batch. Get ready to transform your snack game and keep your body fueled all day long.
Core Ingredients for Perfect Snack Bites

Choosing the Right Base
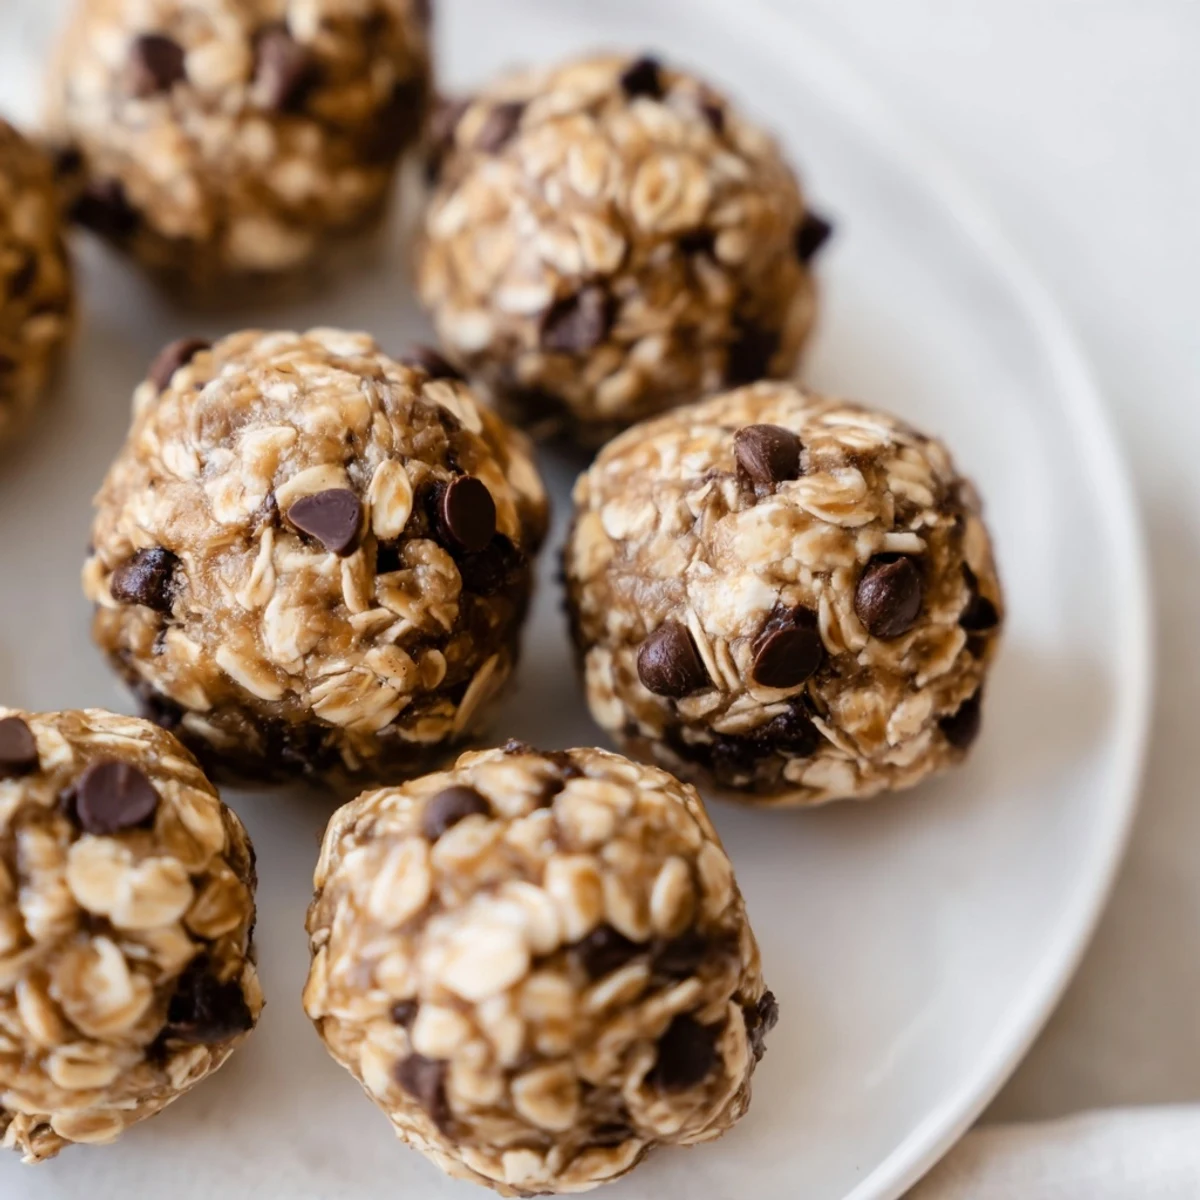
The foundation of any great no-bake bite relies on sturdy, absorbent ingredients. Old-fashioned rolled oats are the most popular choice because they provide excellent structure and a hearty texture. They also deliver a steady stream of complex carbohydrates for lasting stamina.
If you want to switch things up, almond flour or shredded coconut make fantastic alternative bases. These grain-free options add a rich, buttery flavor while keeping the carbohydrate count lower. Just remember that swapping bases often requires adjusting your liquid ingredients to maintain the right dough consistency.
Quinoa flakes and puffed rice can also be folded into your base mixture for added crunch. Whichever foundation you choose, ensure it acts like a sponge to soak up the wet ingredients. This creates that signature chewy texture we all love in a healthy snack.
Adding Healthy Fats and Binding Agents
To transform loose ingredients into perfectly round treats, you need a sticky binding agent. Natural nut butters, like peanut, almond, or cashew butter, are the undisputed champions of this category. They act as the glue while infusing the recipe with healthy fats and plant-based protein.
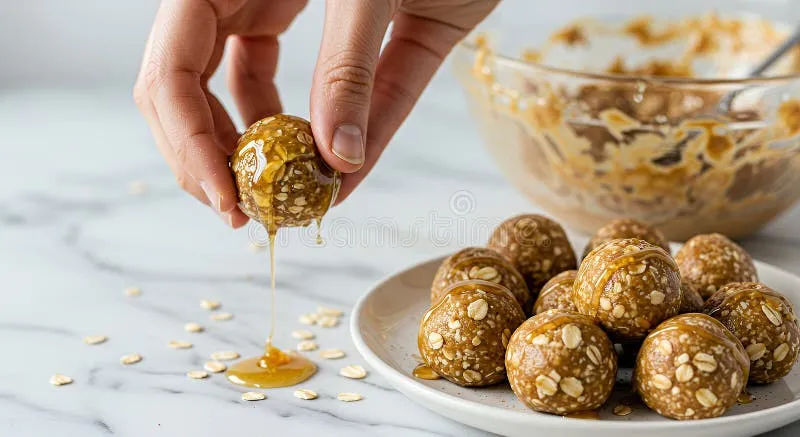
Liquid sweeteners play a dual role by adding sweetness and extra moisture. Pure maple syrup and raw honey are excellent choices that blend seamlessly into the oat mixture. For a fruit-sweetened alternative, Medjool dates blended into a paste work miracles for binding the dough together.
When your mixture feels too dry, a splash of vanilla extract or a teaspoon of melted coconut oil can save the day. The goal is to create a dough that holds its shape when squeezed gently. If it crumbles, you simply need a little more of your chosen sticky binder.
Incorporating Superfoods and Mix-Ins
The mix-ins are where you can truly customize the nutritional profile and flavor of your treats. Dark chocolate chips, dried cranberries, and chopped nuts add irresistible texture and taste. This is your chance to get creative and replicate your favorite dessert flavors in a healthier format.
You can easily elevate these snacks by folding in potent nutritional boosters. Chia seeds, flaxseeds, and hemp hearts add essential omega-3 fatty acids and extra fiber without altering the taste. Some wellness enthusiasts even add ingredients akin to the luxury superfoods actresses swear by, such as collagen powder or maca root.
Protein powders are another brilliant addition for post-workout recovery snacks. Just be mindful that dry powders will absorb moisture, so you may need to add a bit more nut butter or syrup. Balance is key when experimenting with your favorite wholesome mix-ins.
Step-by-Step Guide to Making Homemade Energy Balls
Preparing Your Ingredients
Organization is the secret to stress-free snack preparation. Begin by measuring out all your dry and wet ingredients before you start mixing. Having everything prepped on your counter ensures you won’t accidentally forget a crucial component like salt or vanilla.
If you are using dates or dried fruit, you may want to soak them in warm water for ten minutes beforehand. This softens the fruit, making it much easier to blend into a smooth, sticky paste. Drain the fruit thoroughly before adding it to your food processor.
For recipes requiring chopped nuts or seeds, give them a quick toast in a dry skillet first. Toasting releases their natural oils and dramatically enhances their nutty flavor profile. Allow them to cool completely before adding them to your mixing bowl.
The Mixing and Chilling Process
You can use either a large mixing bowl or a food processor, depending on your chosen ingredients. A bowl and a sturdy spatula work perfectly for simple oat and peanut butter recipes. However, if you are blending dates or whole nuts, a food processor is absolutely necessary.
Combine your base, binders, and flavors until a thick, uniform dough forms. The mixture should look slightly crumbly but hold together firmly when pressed between your fingers. Do not overmix if you are using a food processor, as you want to retain some pleasing texture.
Once mixed, place the entire bowl in the refrigerator for at least 30 minutes. Chilling the dough solidifies the nut butters and coconut oil, making the mixture significantly easier to handle. Skipping this step often results in a sticky, frustrating mess on your hands.
Rolling and Storing for Later
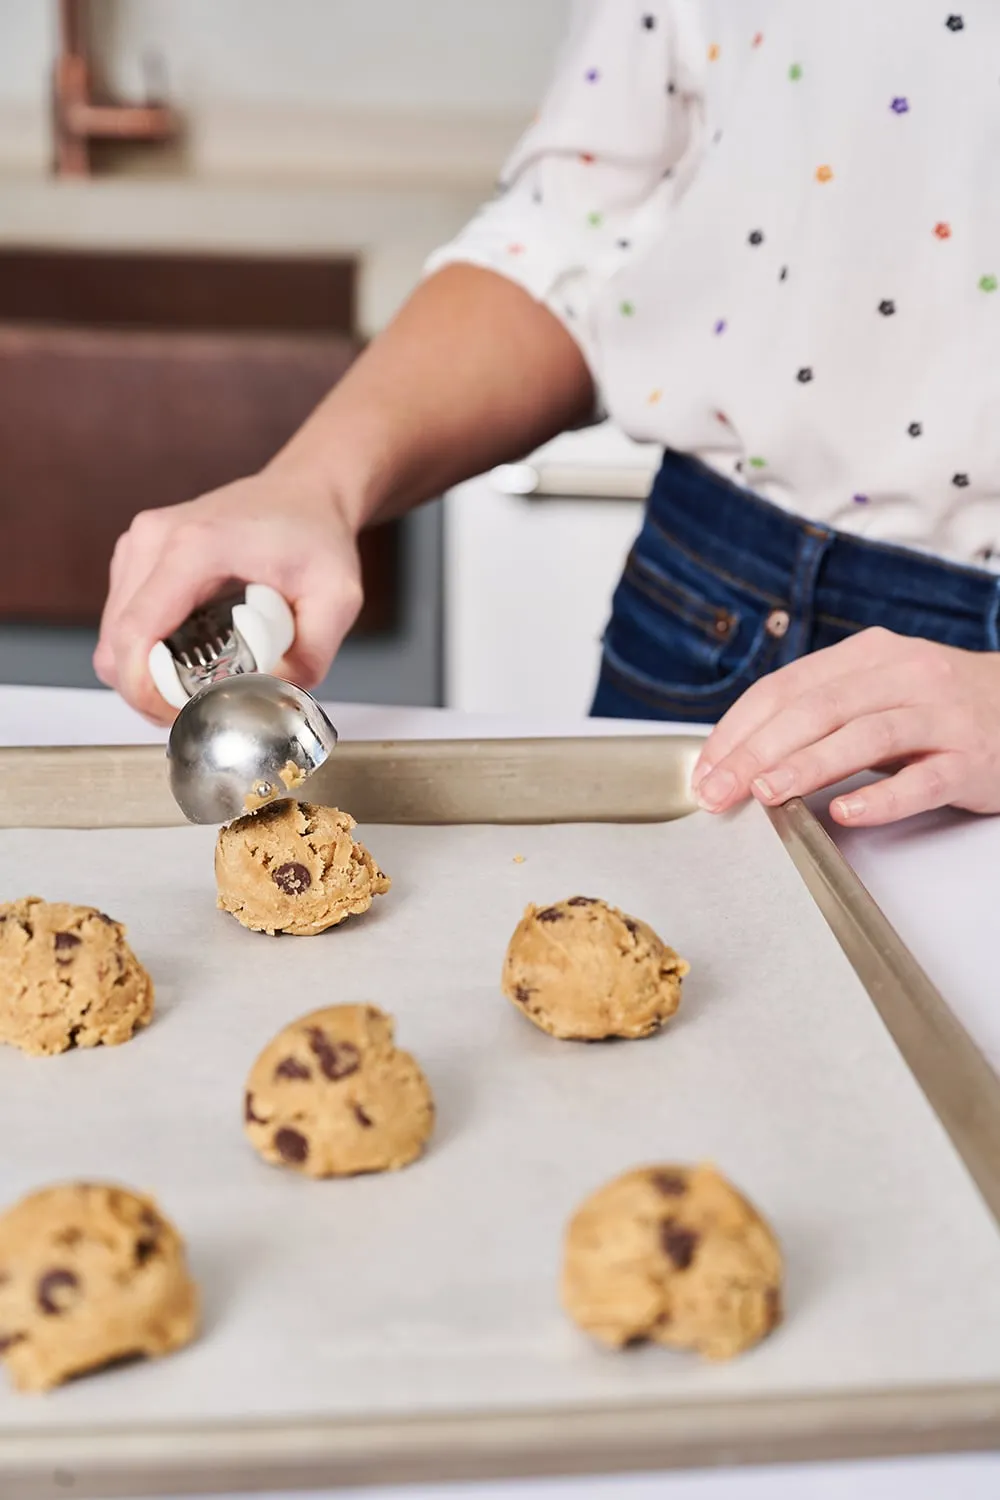
After the dough has chilled, use a small cookie scoop to portion out uniform pieces. A scoop ensures every treat is the exact same size, which helps with portion control and presentation. Roll each portion firmly between your palms until it becomes a smooth sphere.
For an extra touch of flavor and aesthetic appeal, roll the finished spheres in a coating. Shredded coconut, cocoa powder, or crushed nuts make fantastic exterior coatings. Press the coating gently into the surface so it adheres properly.
Proper storage is crucial for maintaining optimal freshness and texture. Keep them in an airtight container in the refrigerator for up to two weeks. For longer storage, they freeze beautifully for up to three months, making them perfect for low fat recipes for wealthy busy business women who need grab-and-go options.
Delicious Flavor Variations and Substitutions
Chocolate Peanut Butter Bliss
You can never go wrong with the classic combination of chocolate and peanut butter. To create this variation, add two tablespoons of unsweetened cocoa powder to your standard oat base. Use creamy peanut butter as your primary binder and fold in mini dark chocolate chips.
This variation tastes remarkably like a decadent peanut butter cup but offers far better nutrition. The cocoa provides a dose of antioxidants, while the peanut butter delivers satiating plant protein. It is the perfect remedy for late-night sweet cravings.
If peanut allergies are a concern, sunflower seed butter is a fantastic one-to-one substitute. It mimics the roasted, earthy flavor of peanuts perfectly. Just be aware that sunflower butter can sometimes turn baked goods green, though this won’t happen in these no-bake treats.
Tropical Coconut and Fruit
Transport your taste buds to a sunny beach with a bright, fruity flavor profile. Use cashew butter or almond butter as your base, as their milder flavors allow the fruit to shine. Incorporate dried pineapple, chopped mango, and a splash of fresh lime juice.
Roll the finished bites in toasted shredded coconut for an authentic tropical finish. You can also add a pinch of ground ginger or turmeric for an extra anti-inflammatory boost. These lighter variations are incredibly refreshing during warm summer months.
For an added crunch, toss in some macadamia nuts or sliced almonds. The combination of chewy dried fruit and crunchy nuts creates a highly satisfying mouthfeel.
Trail Mix Inspired Creations
Harness the rugged, satisfying elements of your favorite hiking snack in a convenient bite. Mix equal parts oats, pumpkin seeds, sunflower seeds, and raisins into your mixing bowl. Bind the mixture together with natural almond butter and a touch of raw honey.
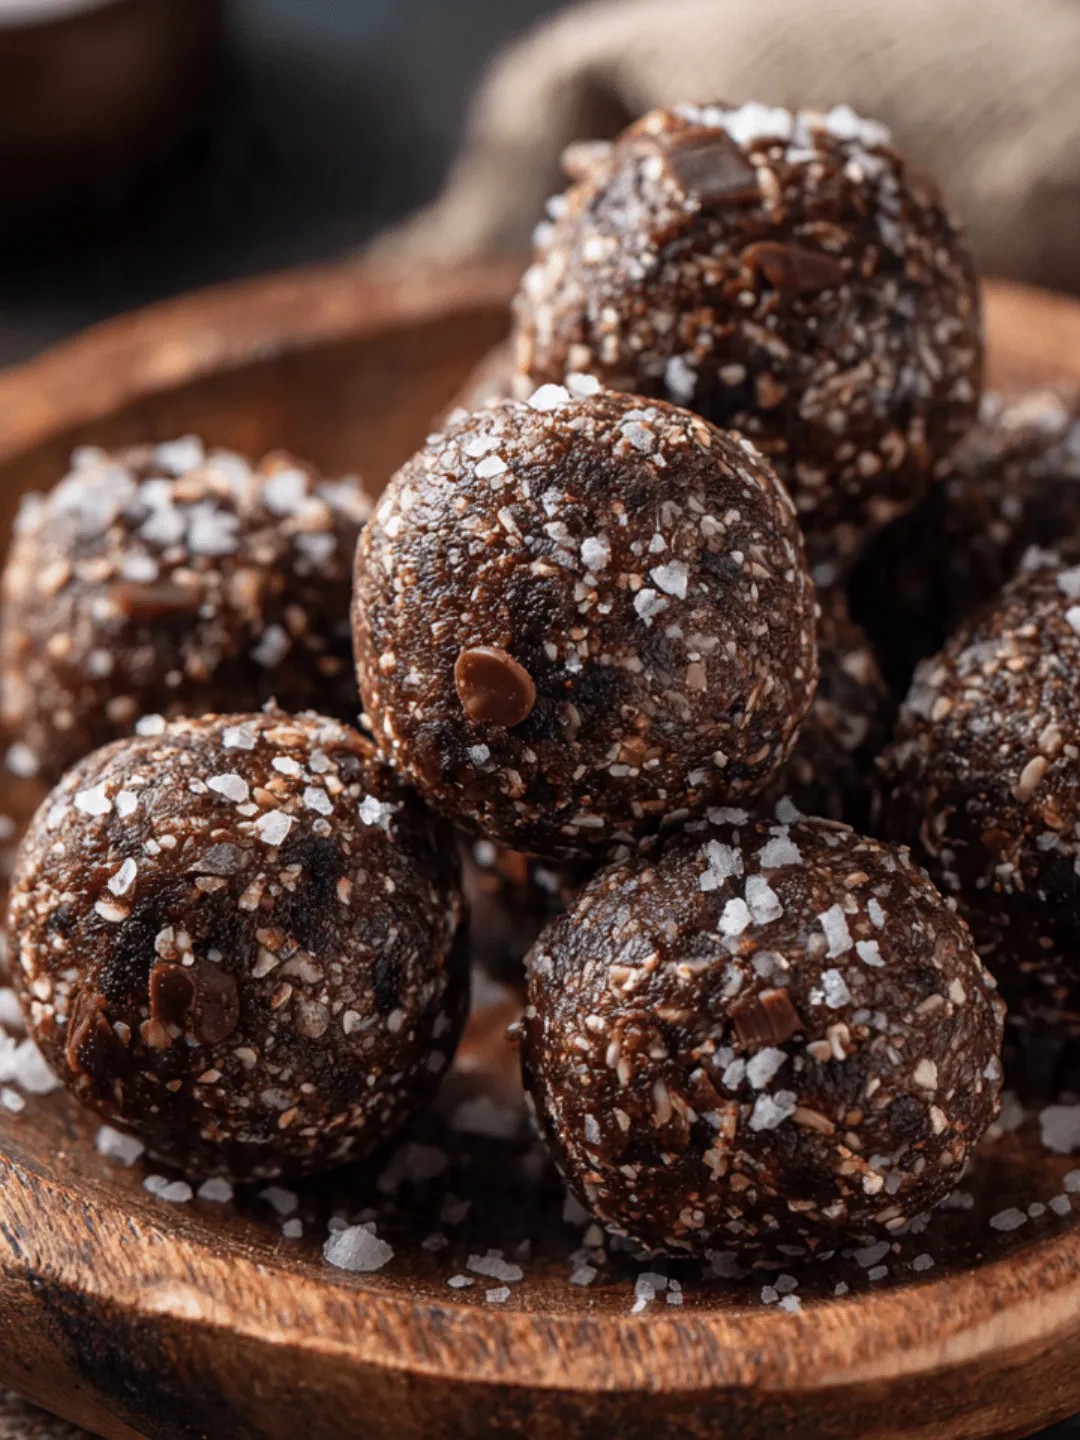
Add a dash of cinnamon and a pinch of sea salt to elevate the savory-sweet dynamic. The sea salt is especially important here, as it balances the sweetness of the honey and raisins. You can even add crushed pretzels if you plan to eat them within a few days.
These hearty bites provide a steady release of carbohydrates and fats, mimicking the benefits of a power-packed peak performance breakfast. They are the ultimate companion for long hikes, road trips, or demanding work shifts.
Nutritional Benefits of Homemade Energy Snacks
Sustained Fuel for Busy Days
The macro-nutrient profile of these no-bake snacks is specifically designed for endurance. Complex carbohydrates from oats provide a slow, steady release of glucose into your bloodstream. This prevents the sharp insulin spikes and subsequent crashes associated with sugary candy bars.
The healthy fats from nuts and seeds slow down digestion, keeping you satiated for hours. This steady energy delivery makes them ideal for pre-workout fuel or an afternoon office pick-me-up. You get a reliable burst of vitality exactly when you need it most.
Because they are so nutrient-dense, you only need one or two to feel completely satisfied. This makes them highly efficient fuel sources for people with demanding, fast-paced lifestyles.
High-Fiber and Protein-Packed Goodness
Dietary fiber is an unsung hero in the wellness world, and these treats deliver it in spades. Oats, chia seeds, and flax meal are all exceptional sources of soluble and insoluble fiber. A high-fiber intake promotes healthy digestion and supports a thriving gut microbiome.
Protein is equally important, especially for those actively building muscle or recovering from exercise. By incorporating hemp hearts, nut butters, or a scoop of whey powder, you easily boost the protein content. Just a couple of these snacks can provide up to ten grams of quality protein.
This combination of protein and fiber is the ultimate secret to long-lasting fullness. It sends powerful satiety signals to your brain, naturally regulating your appetite throughout the day.
Controlling Sugar and Macros
One of the greatest advantages of making your own snacks is total ingredient control. Store-bought bars are frequently loaded with refined sugars, high-fructose corn syrup, and artificial preservatives. When you make them at home, you dictate exactly what goes into your body.
You can easily lower the glycemic index by using natural sweeteners like stevia, monk fruit, or just a minimal amount of maple syrup. If you are tracking macronutrients for a specific diet, the recipe can be tweaked instantly. Add more fats for a keto-friendly version, or more oats for high-carb endurance days.
This level of customization ensures your snacks align perfectly with your personal health goals. You never have to compromise your dietary standards for the sake of convenience again.
Store-Bought vs Homemade Snack Comparison
Walking down the grocery store snack aisle can be overwhelming with countless packaged options. While convenient, these commercial bars and bites often come with hidden drawbacks. Let’s look at how the homemade versions stack up against their commercial counterparts.
Creating your own snacks requires a small upfront time investment, but the long-term benefits are substantial. From cost savings to nutritional superiority, the advantages of making them in your own kitchen become clear very quickly.
The table below highlights the stark differences between a typical packaged snack and a freshly made batch. Reviewing these factors can help you make a more informed decision about your weekly meal prep strategy.
| Feature | Homemade Snacks | Store-Bought Bars |
|---|---|---|
| Cost per Serving | Highly affordable ($0.20 – $0.50) | Expensive ($1.50 – $3.00+) |
| Sugar Content | Customizable, uses natural sweeteners | Often high in refined sugars and syrups |
| Preservatives | 100% natural, no chemical additives | Contains shelf-stabilizers and artificial flavors |
| Customization | Limitless dietary and flavor variations | Fixed ingredients, hard for allergies |
| Freshness | Maximum nutrient retention when fresh | Can sit on shelves for several months |
Pro Tips for Crafting the Best Energy Balls
Even though these recipes are beginner-friendly, a few insider techniques can elevate your results from good to spectacular. The difference between a crumbly mess and a perfectly chewy treat usually comes down to technique.
Over the years, seasoned meal preppers have discovered brilliant hacks for achieving the ultimate texture. Implementing these small adjustments will save you time and prevent ingredient waste in the kitchen.
Follow these expert tips to ensure your next batch of homemade energy balls turns out flawlessly every single time:
- Use drippy nut butter: Always choose natural nut butters that are creamy and pourable. The oily, liquid consistency binds the dry oats together much better than stiff, processed peanut butter.
- Wet your hands: If the dough is sticking stubbornly to your palms while rolling, lightly dampen your hands with cold water. This creates a barrier that allows the dough to roll smoothly.
- Toast your oats: For an incredible depth of flavor, spread your raw oats on a baking sheet and toast them for ten minutes at 350°F. The resulting nutty aroma will completely transform the recipe.
- Pulse, don’t puree: When using a food processor to mix in chocolate chips or dried fruit, pulse the machine gently. You want distinct chunks of flavor, not a homogenous, muddy paste.
- Salt is essential: Never skip the pinch of salt in your recipe. A tiny amount of high-quality sea salt enhances the sweetness and brings out the nuances of the vanilla and chocolate.
- The squeeze test: Before you begin rolling the entire batch, grab a small handful of dough and squeeze it. If it falls apart, add a tablespoon of syrup; if it is too wet, add a tablespoon of oats.
Frequently Asked Questions about energy balls
Do energy balls need to be refrigerated?
While they can survive at room temperature for a few hours, they should be stored in the refrigerator. Chilling them helps maintain their round shape and prevents the natural oils in the nut butter from going rancid. They will stay fresh in an airtight container in the fridge for up to two weeks.
Can I freeze homemade energy balls?
Yes, freezing is an excellent way to preserve these snacks for long-term meal prep. Place them in a single layer on a baking sheet to freeze solid, then transfer them to a freezer-safe bag. They will keep perfectly for up to three months and only take a few minutes to thaw at room temperature.
Are energy balls good for weight loss?
They can be a highly effective part of a weight loss plan when consumed in moderation. Because they are packed with fiber and protein, they prevent overeating by keeping you deeply satisfied between meals. However, they are calorie-dense, so portion control is essential.
Why are my energy bites falling apart?
Crumbly dough is almost always the result of an imbalance between wet and dry ingredients. If your mixture will not stick together, add a splash of warm water, extra maple syrup, or more creamy peanut butter. Mix thoroughly and try the squeeze test again.
Can I make these without oats?
Absolutely! If you prefer a grain-free option, you can substitute the oats with almond flour, coconut flakes, or a blend of ground nuts and seeds. You may need to adjust your binding liquids slightly, as different bases absorb moisture at different rates.
Are these snacks safe for kids to take to school?
They are a wonderful lunchbox addition, provided you follow the school allergy guidelines. Since many schools are nut-free, use sunflower seed butter or soy butter instead of peanut or almond butter. They are a much healthier alternative to packaged fruit snacks or cookies.
How many calories are typically in one serving?
Depending on the specific ingredients and the size of your scoop, they usually range from 100 to 150 calories each. The majority of these calories come from healthy, nutrient-dense sources like nuts and seeds. Two pieces generally make for a satisfying, balanced snack.
Can I use quick oats instead of rolled oats?
Quick oats can be used in a pinch, but they will yield a mushier, denser texture. Old-fashioned rolled oats are highly recommended because they maintain a satisfying chewiness and structure. If using quick oats, you might need to use slightly less liquid.
Conclusion
Mastering the art of making homemade energy balls is a simple yet powerful step toward better daily nutrition. By combining wholesome oats, creamy nut butters, and naturally sweet mix-ins, you create a powerhouse snack that genuinely fuels your lifestyle. They eliminate the midday slump, provide targeted macro-nutrients, and save you money compared to expensive store-bought bars. Plus, the endless flavor variations mean you will never grow bored of your meal prep routine.
Now that you understand the fundamental ratios and expert techniques, it is time to get into the kitchen and start rolling. Experiment with tropical fruits, decadent dark chocolate, or savory seeds to discover your ultimate flavor combination. If you found this guide helpful, be sure to bookmark this page for your next Sunday meal prep session, and share it with friends who could use a healthy snack upgrade.
